woodwork help oak plywood cabinet finish stain

Status
Not open for further replies.
Joined
Aug 12, 2002
Messages
1,680
Location
CT
building 2 utility cabinets, not really a cabinet just going to be 2 walls and a top to support computer tower off the floor and allow for office junk to be stored underneath. whether i make a bottom or shelves depends on how much i can get out of the single piece of plywood. i bought a 4x8 sheet of oak 3/4" plywood from home depot, it was $50. it's the type of project where cost is #1 priority and utility is close second, and i did not plan on finishing or staining it. For where it's going to be it doesn't matter that much, and I am going to zip it together so black drywall screws are going to be visible on the sides... but where the thing is going to be located they pretty much won't be visible.

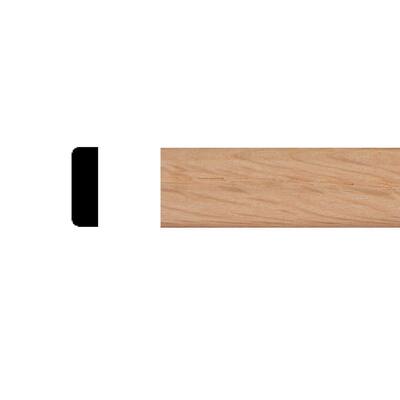
question i have is for the cut ends of the plywood, which will be visible on the front of the cabinet, there will be no door, what's the best way to seal that so it doesn't fray and chip over time?
and i would be ok with spending up to ~$30 more on materials, so is it possible to stain and finish the veneer side of the oak plywood if so how?
 
If you have a table saw and a router it'd be easy.

Just cut it to the dimensions that you'd like then route the edges.

Prime it to seal things up, paint it to look better, call it a day. It shouldn't be fraying with rounded smooth edges that are sealed up against humidity and moisture.
 
Rip a piece of oak ( oak faced plywood?) ( popular if its burch plywood ) and attach around the plywood. An alternative is to buy a roll of veneer and glue that around the plywood , you will need to stain it too.
 
Last edited:
When I built the bookcases for our bookstores I also used 3/4" Oak Veneer ply and I used only Watco oil on them. I used one with just a very light stain on the oak, been too long to remember which now though. The shelves were 5/4" clear fir and I used clear Watco on those.

Watco Danish Wood Oil is just a highly refined linseed oil, but man, the wood loves it!

Everything was cut on a Rockwell table saw. First was all the actual cuts, then dado heads for the grooves necessary to fit everything together. Then, glued and clamped, no screws or nails except for the shelf standards.

I tell you all this just to let you know that after all the expense and all the work, I still used only the Watco oil on them.

Top picture, of course, they're finished, they've been oiled and are drying waiting for their first load of books.

Bottom two are finished and in use! This was one of 2 stores and those bookcases were accused of being commercial many times!

Sorry about the pic quality but these pictures are 30 years old, taken on film by an amateur.
blush.gif


Photograph4_zps73751222.jpg


Photograph3_zps35f4337e.jpg


Photograph2_zpscdedc527.jpg
 
Oh, I lied about the nails, and forgot to answer your question about the cut ends. What you see on the edges/cut ends of those bookcases is clear pine flat stock, like screen door molding glued and finish nailed to the plywood. Worked great.
 
So it's essentially just going to be an upside down U?

While the top resting on the sides shoukd support mass, I can't see how screws into the plies will be strong against shear or how they will work without spreading the wood as you go through the plies (pre drill of course).

I think you need at least one cross member in the back.

I agree on routing the edge.

Oak doesn't always take paint well, so read up on finishing oak.
 
The iron on verneer strip may tend to Frey after time.
For utility storage, as yours, that need not look fist class, I might sand and paint or stain the edges, then sand (lightly) and Danish oil the rest.
 
1. Use veneer tape. I like to apply a very thin layer of regular glue to the raw edge first and allow it to dry before applying the tape. It seems to help it stick better.

2. Buy a small tub of drywall compound and apply it over the raw edges, when dry sand smooth, prime and paint.

3. Buy a piece of matching oak, rip into thin strips on a tablesaw or bandsaw, glue/nail into place and trim flush. Much more durable than cheap tape.
 
yeah sorry, no table saw on hand.
using jig saw and straight edge, that's it. and i have an orbital sander with various pads from 80 to 320 so i can at least sand things easily.

will be using 1" x 3" pine as cross member in the back at bottom and along the top inside walls where the top will screw into. I did not plan on screwing the top into the 3/4" cut end of the walls. yes, it is an upside down U.

with sealing up the cut ends, i was thinking along the lines of sanding sealer and there was some other type i read about last night but forget.
i don't want to buy a matching piece of oak, i have no means of stripping it plus it's like $10 per foot and i'd need 3 feet of it.
when people say, seal things up, with what? what product?


both cabinets are 24" deep. one cabinet is is 30" high by 15" wide. the other cabinet is 28" high by 10" wide.

and the existing computer desks are golden oak color, nothing fancy, so if i could stain the plywood so it matches somewhat that would be a plus.
http://s2.postimg.org/bzvdhsort/cabinet.jpg
 
Last edited:
Originally Posted By: 1 FMF
yeah sorry, no table saw on hand.
using jig saw and straight edge, that's it. and i have an orbital sander with various pads from 80 to 320 so i can at least sand things easily.

will be using 1" x 3" pine as cross member in the back at bottom and along the top inside walls where the top will screw into. I did not plan on screwing the top into the 3/4" cut end of the walls. yes, it is an upside down U.

with sealing up the cut ends, i was thinking along the lines of sanding sealer and there was some other type i read about last night but forget.
i don't want to buy a matching piece of oak, i have no means of stripping it plus it's like $10 per foot and i'd need 3 feet of it.
when people say, seal things up, with what? what product?


both cabinets are 24" deep. one cabinet is is 30" high by 15" wide. the other cabinet is 28" high by 10" wide.

and the existing computer desks are golden oak color, nothing fancy, so if i could stain the plywood so it matches somewhat that would be a plus.
http://s2.postimg.org/bzvdhsort/cabinet.jpg


A jigsaw and straight edge won't give a nice finish. If you can get your hands on a circular saw use it with a straight edge. It'll finish better
And if using a circ saw have the finished end on the bottom to prevent tear out of the veneer.
 
It could be too late now, but it might have been better for HD to cut the Ply for you.
Here they charge $1 a cut after the first cut, and it would save you having to manhandle an 8x4 sheet.

As for sealing the edges, I have even used Bondo in the past, it sticks well and is easy to sand and takes stain quite well.
 
Originally Posted By: bornconfuzd
Oh, I lied about the nails, and forgot to answer your question about the cut ends. What you see on the edges/cut ends of those bookcases is clear pine flat stock, like screen door molding glued and finish nailed to the plywood. Worked great.

I haven't used HD red oak plywood in a few years, but current reviews indicate the veneer is literally paper thin, with poor adhesion, and has hollow voids underneath that easily allow to poke thru the veneer. Be mindful of this (IF true) and sand very gingerly. Treat edges carefully to avoid veneer edge tearing.

BASED ON BUILDING YOUR BOXES WITH ZERO PROPER WOOD WORKING TOOLS:

- I would definitely let HM make all cuts that will be visible joints.
- I would treat the edges as bornconfused did above.....cover the exposed edges with oak screen trim (glued/finish brad). Wipe all squeezed out glue off while wet to avoid finish problems. http://www.homedepot.com/p/House-of-Fara..._-203116459-_-N
6b79d57c-1588-4185-840d-deb176be7a11_400.jpg


- Top? #1: I would inset it down just like bornconfuzed did, with the edge grain covered with the screen trim OR #2: make the top over lap the front and sides 1/4 to 3/8 inch (again trimmed in screen edging) to make it like a table top.
#1
Photograph3_zps35f4337e.jpg

#2
edmundson-plywood-furniture.jpg


- 1 x 3 pine top support is over kill. Use 1 x 2 and start it about 3 inches away from the front opening to hide it.
- Ditch the screws in any VISIBLE joints and use wood glue and small finish nails 3d and 4d.
- Triangular top back pieces or TWO rectangular back brace pieces (easier) will prevent racking.

FINISHING: The Watco Danish Oil is probably the easiest and cheapest. My next recommendation is to use a wipe-on varnish, which IMO is BETTER than Watco. I make my own wipe-on by diluting MinWax Spar varnish (alkyd-phenolic resin) 50:50 with mineral spirits. No brush marks. 2 to 6 or more applications depending if you want a very slight build up. I have wipe-on "tricks" if want more info. As easy as Danish oil, with more resin.

I recommend everyone learn about wipe=on varnish:
https://www.google.com/search?q=flecnor+...wipe+on+varnish
 
Originally Posted By: doitmyself
I haven't used HD red oak plywood in a few years, but current reviews indicate the veneer is literally paper thin, with poor adhesion, and has hollow voids underneath that easily allow to poke thru the veneer. Be mindful of this (IF true) and sand very gingerly. Treat edges carefully to avoid veneer edge tearing.


I expect things have changed since the mid 80s with regard to quality of plywood just as it has with most things. Shame. The stuff I used then was tough as iron. After fifteen years of hard use, including being rearranged within stores and moved to different locations, we donated them to a local Catholic K-12 school, in excellent condition needing only some cleaning and a little more oil, for their new library.

As doitmyself points out though, I expect there ARE better treatments for the surface than Watco oil. As I think about it, one of our considerations was ongoing maintenance. It occurred to us that minor repairs could be easily made with a bit of colored repair stick and a little more oil. Also, because of the extremely dry climate we could overcome dry cracking with occasional application of more oil as needed.

It also occurs to me now that OP is building furniture and I was building display shelving for commercial retail use. Not sure my post has much bearing on the OPs concerns now that I look closer.

I will say this though, after all those years of hard life, not a single joint broke loose. Those joints, ends to tops to centers were all grooved and glued with Elmers yellow wood glue then clamped with pipe clamps for 72 hours to dry. There were no screws or nails, just that glue. I'll bet that they're still in use today and still solid.

Thanks for the clarifications doitmyself!
 
Status
Not open for further replies.
Back
Top