I was doing a front-brake overhaul, rebuilding the calipers and replacing the rotors and pads -- all with Toyota OEM kits and parts of course, also using Castrol DOT 4 brake fluid and CRC synthetic brake grease for the bushings and Toyota lithium-soap-base glycol grease provided in the kit for inside the cylinder. It turned out that the last time I had taken the car to a shop, they had stripped the threads on the wheel studs, probably because of overtorquing thanks to using impact wrenches -- which should never be used for installing wheel nuts to begin with.
First time I reinstalled the nut on the stripped wheel stud, I reinstalled it with great difficulty. I got the Toyota OEM wheel studs. When I tried to remove the nut, it wouldn't come out but turn freely -- the nut had turned into an E-ring on the wheel stud. See where the nut cut a groove near the tip of the wheel stud:
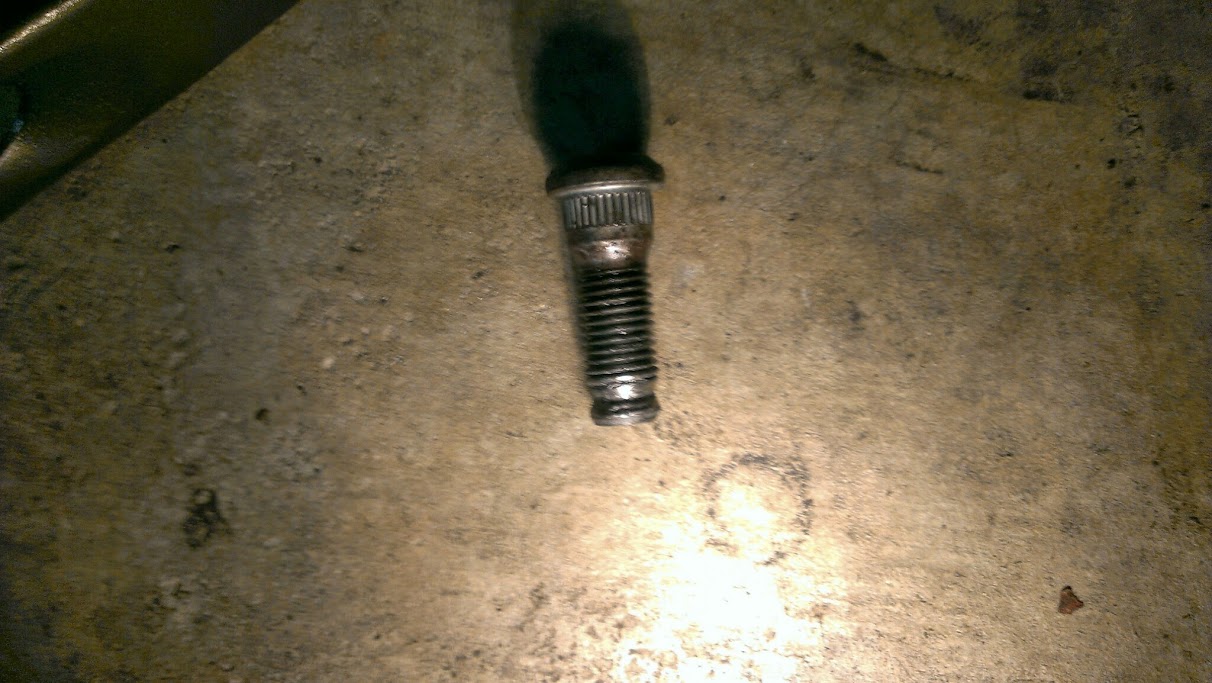
Anyway, after great difficulty, I was able to remove the nut by turning it a slanted angle using a Vise-Grip in order to strip the stud further. It must have taken maybe a thousand turns to strip it loose.
I am posting this because the commonly found instructions on the Internet are wrong and they will likely damage the new studs. Most instructions will say to use the nuts to pull the new wheel studs in. Don't even get me started on that. This is simply wrong. In my case, it didn't work with a reasonable amount of torque on the nuts. Even if it worked, there is a good chance that you could damage the new wheel studs internally and/or externally due to overtorquing. In fact, Lisle even sells a washer to help with pulling a wheel stud by a nut and they charge a fortune for that simple washer. It shouldn't be used, as it will potentially damage the new wheel studs.
Lisle wheel-stud-installer washer -- DO NOT USE -- POTENTIAL WHEEL-STUD FAILURE:

Here is a good study on wheel-stud failure due to improper installation or seating: PDF link. They also mention that nuts or nuts along with washers (like the Lisle wheel-stud washer tool) shouldn't be used to seat the wheel studs, which could internally and/or externally damage the wheel studs.
Most instructions on the Internet also advice using a hammer to tap the old wheel studs out. However, this could potentially damage the wheel bearing. Nevertheless, that's what I did because I didn't know better at that time.
Some will instruct to find an hydraulic jack to seat the new wheel studs. This won't be practical for most people and besides who wants to remove the axle hub.
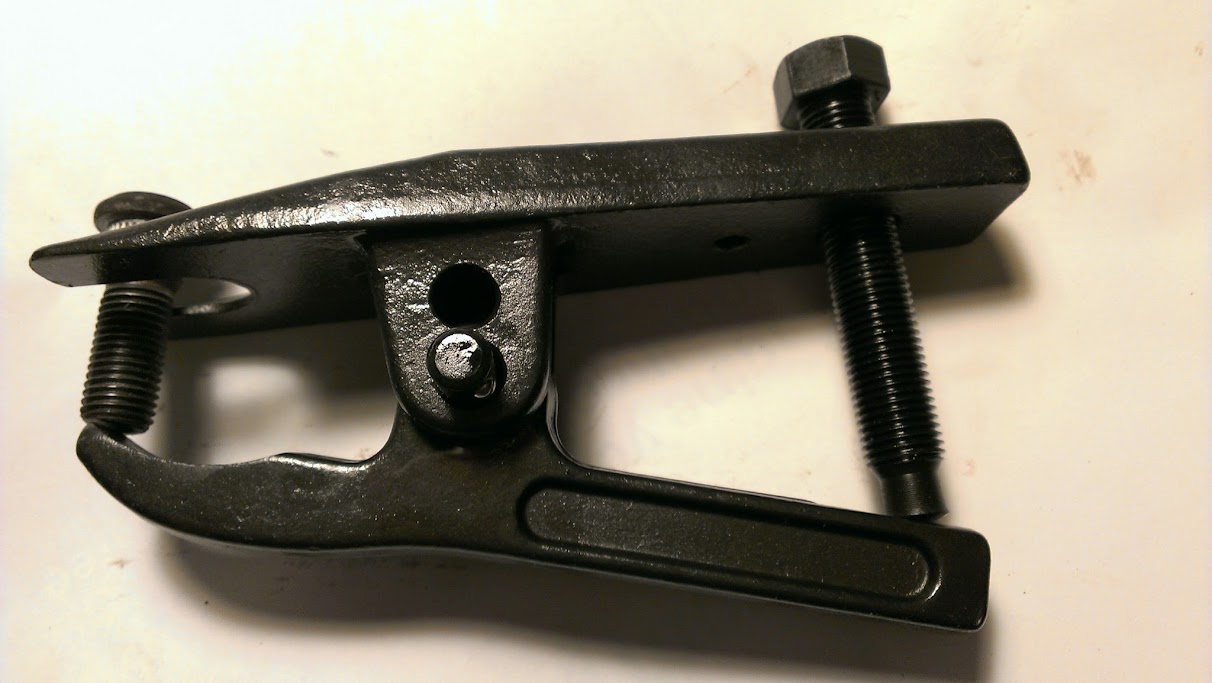
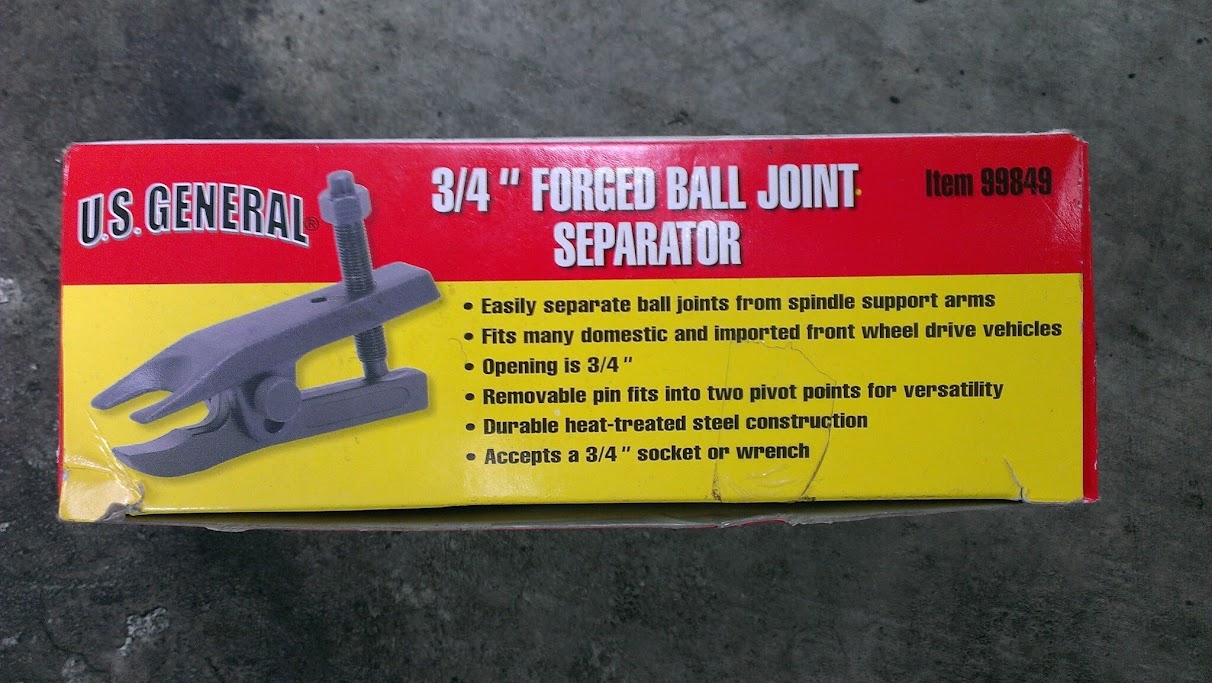
Then I discovered an excellent tool to install and remove the wheel studs. It's the Harbor Freight US General ball-joint separator item no. 99849. I got it for $19.99 + tax at a local Harbor Freight store and you can get it for $19.99 + shipping online through Harbor Freight.

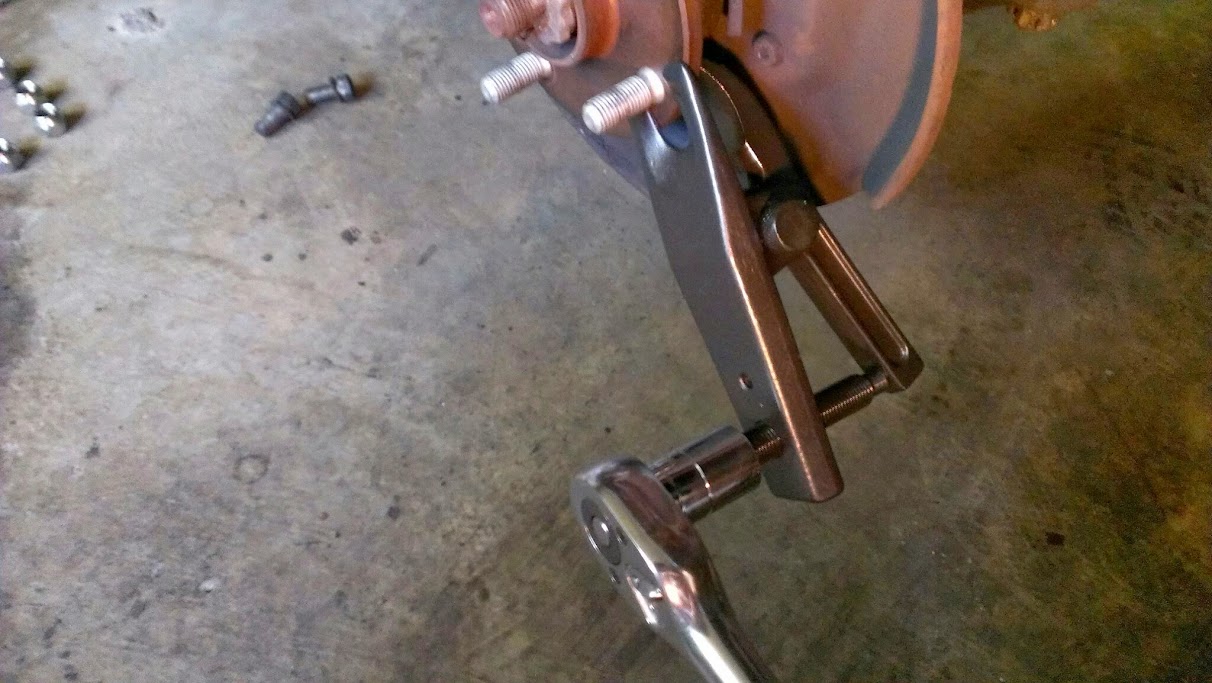
The tool fits perfectly on the wheel studs and works very well. The pivot pin has two switchable positions for smaller or larger opening. It does take a somewhat large torque on the screw to fully seat the wheel stud but it works. You may find it greatly helpful to lubricate the wheel-stud holes and wheel-stud grooves with motor oil before you put the new wheel studs in. Simply place the tool on the wheel stud as seen in the picture below and turn the screw with a half-inch-drive ratcheting handle and 3/4-inch socket until it's very hard to turn. However, be careful not to overtorque the screw on the tool, as it could easily strip its threads. Use common sense and don't torque it after you feel that you may be stripping the screw threads on the tool. After the wheel stud is seated, a light torque is sufficient to turn the screw back to remove the tool. Note that it's extremely important the lubricate the screw on the tool with motor oil before you use it.
CAUTION: It's crucial to lubricate the screw on the tool with motor oil before you use it.
To remove the wheel studs, simply use the same tool installed in reverse. This is much better than using a hammer to remove the wheel studs, which could potentially damage the wheel bearing.
Again, this Harbor Freight ball-joint-separator tool works very well for installing, seating, and removing the wheel studs and I very highly recommend it to everyone. It's a must-have for all do-it-yourselfers and repair shops as well. You will desperately need it if you discover that the shop stripped your wheel-stud threads.
First time I reinstalled the nut on the stripped wheel stud, I reinstalled it with great difficulty. I got the Toyota OEM wheel studs. When I tried to remove the nut, it wouldn't come out but turn freely -- the nut had turned into an E-ring on the wheel stud. See where the nut cut a groove near the tip of the wheel stud:
Anyway, after great difficulty, I was able to remove the nut by turning it a slanted angle using a Vise-Grip in order to strip the stud further. It must have taken maybe a thousand turns to strip it loose.
I am posting this because the commonly found instructions on the Internet are wrong and they will likely damage the new studs. Most instructions will say to use the nuts to pull the new wheel studs in. Don't even get me started on that. This is simply wrong. In my case, it didn't work with a reasonable amount of torque on the nuts. Even if it worked, there is a good chance that you could damage the new wheel studs internally and/or externally due to overtorquing. In fact, Lisle even sells a washer to help with pulling a wheel stud by a nut and they charge a fortune for that simple washer. It shouldn't be used, as it will potentially damage the new wheel studs.
Lisle wheel-stud-installer washer -- DO NOT USE -- POTENTIAL WHEEL-STUD FAILURE:
Here is a good study on wheel-stud failure due to improper installation or seating: PDF link. They also mention that nuts or nuts along with washers (like the Lisle wheel-stud washer tool) shouldn't be used to seat the wheel studs, which could internally and/or externally damage the wheel studs.
Most instructions on the Internet also advice using a hammer to tap the old wheel studs out. However, this could potentially damage the wheel bearing. Nevertheless, that's what I did because I didn't know better at that time.
Some will instruct to find an hydraulic jack to seat the new wheel studs. This won't be practical for most people and besides who wants to remove the axle hub.
Then I discovered an excellent tool to install and remove the wheel studs. It's the Harbor Freight US General ball-joint separator item no. 99849. I got it for $19.99 + tax at a local Harbor Freight store and you can get it for $19.99 + shipping online through Harbor Freight.
The tool fits perfectly on the wheel studs and works very well. The pivot pin has two switchable positions for smaller or larger opening. It does take a somewhat large torque on the screw to fully seat the wheel stud but it works. You may find it greatly helpful to lubricate the wheel-stud holes and wheel-stud grooves with motor oil before you put the new wheel studs in. Simply place the tool on the wheel stud as seen in the picture below and turn the screw with a half-inch-drive ratcheting handle and 3/4-inch socket until it's very hard to turn. However, be careful not to overtorque the screw on the tool, as it could easily strip its threads. Use common sense and don't torque it after you feel that you may be stripping the screw threads on the tool. After the wheel stud is seated, a light torque is sufficient to turn the screw back to remove the tool. Note that it's extremely important the lubricate the screw on the tool with motor oil before you use it.
CAUTION: It's crucial to lubricate the screw on the tool with motor oil before you use it.
To remove the wheel studs, simply use the same tool installed in reverse. This is much better than using a hammer to remove the wheel studs, which could potentially damage the wheel bearing.
Again, this Harbor Freight ball-joint-separator tool works very well for installing, seating, and removing the wheel studs and I very highly recommend it to everyone. It's a must-have for all do-it-yourselfers and repair shops as well. You will desperately need it if you discover that the shop stripped your wheel-stud threads.