Since I was changing the radiator on it (link to relevant thread), I figured I might as well add a supplementary external transmission cooler while I was at it. And, after looking at it, I figured that I'd replace the cheesy power steering fluid cooler, too (which was just a long U-shaped tube).
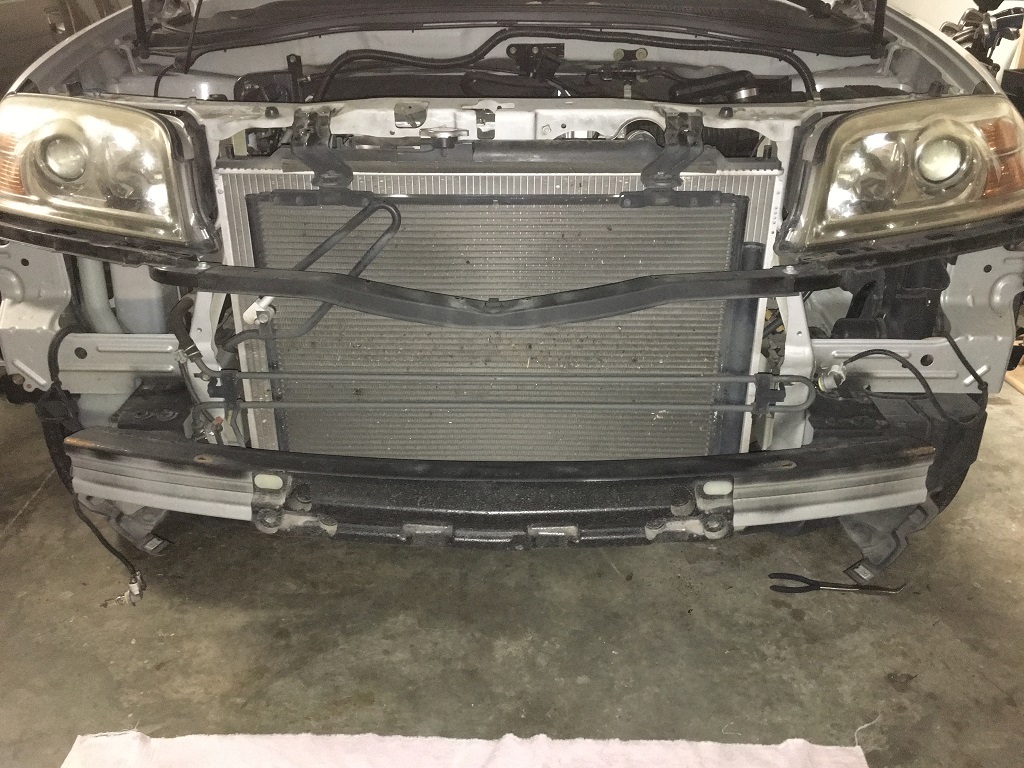
That long U-shaped tube that spans the width of the opening is the power steering cooler. Gee, Honda, don't go out of your way for anything fancy, here.

Old power steering fluid cooler and bumper off...ready to start building.
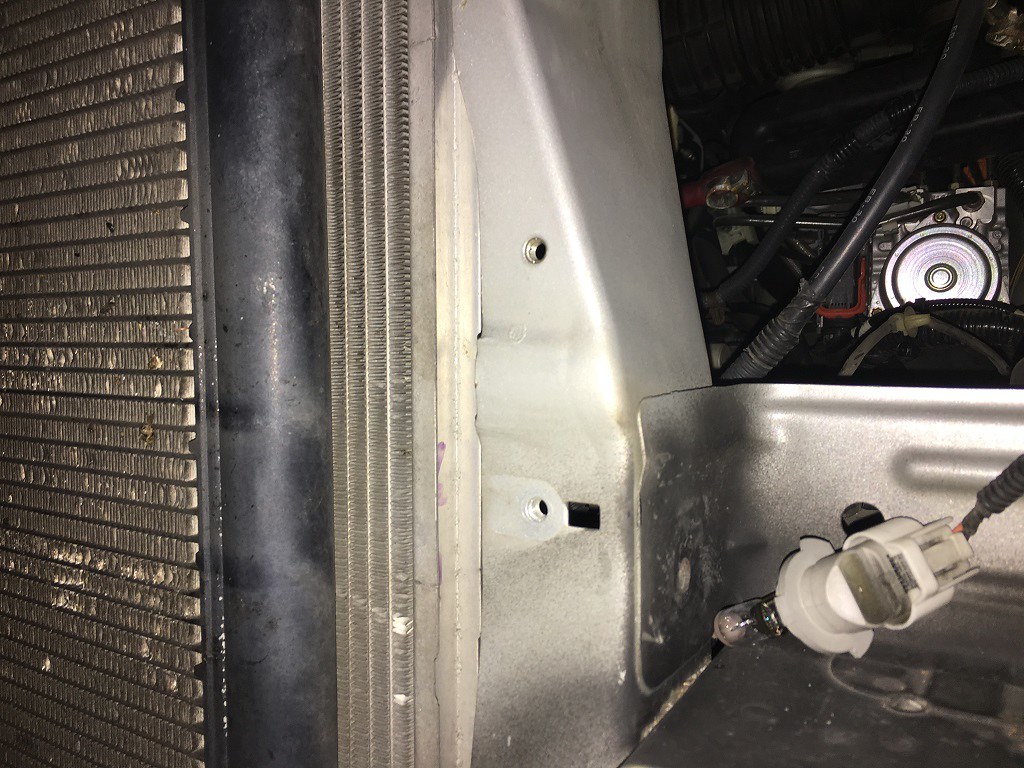
These two holes right here (well, four, including the matching ones on the opposite post) would make great mounting points for some aluminum C-channel. More on that in a minute.
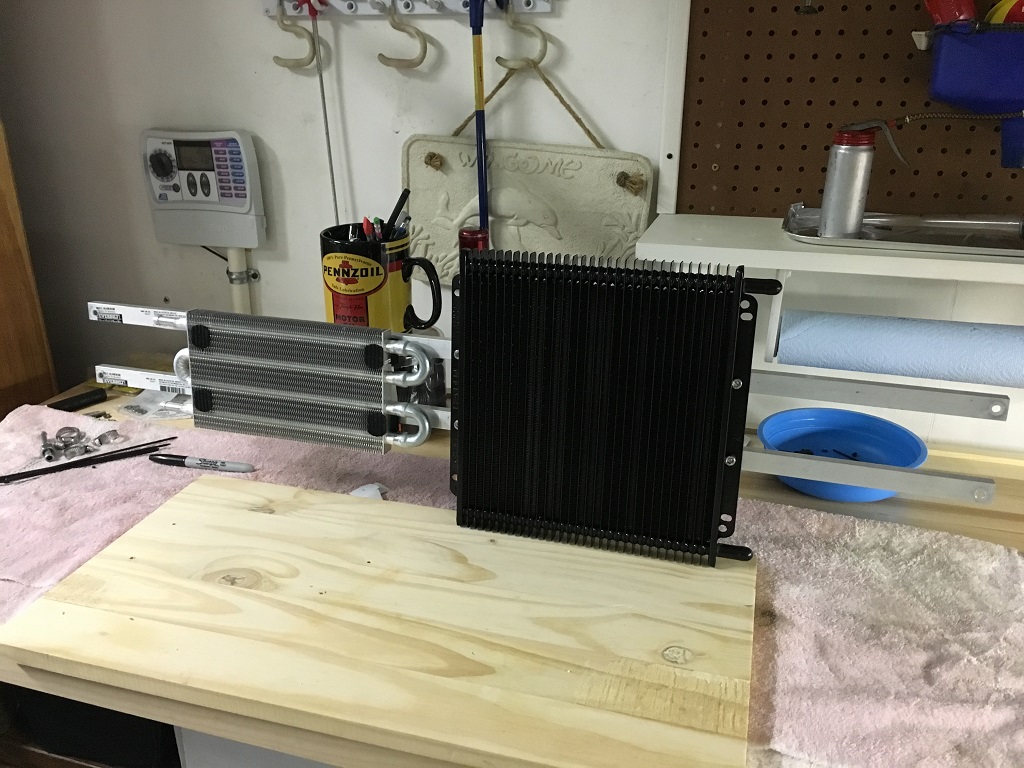
I gleaned some insight from our Ridgeline for this project, as it comes from the factory with power steering fluid and transmission fluid coolers in front of the condenser. The power steering fluid cooler is a simple two-pass serial flow cooler (like the MDX's U-shaped tube, but shorter, and with fins). So I figured that the smallest serial flow cooler I could get would suffice here for the MDX. The Ridgeline's transmission fluid cooler is a parallel flow multiplate cooler, much like a radiator in concept. So I bought a nice parallel flow multiplate cooler for this application to match it. Both were from Hayden and the shiny serial flow one was made in the United States and the black parallel flow one was made in Australia. Both appear to be very good quality. The pair cost about 100 bucks from Advance Auto.
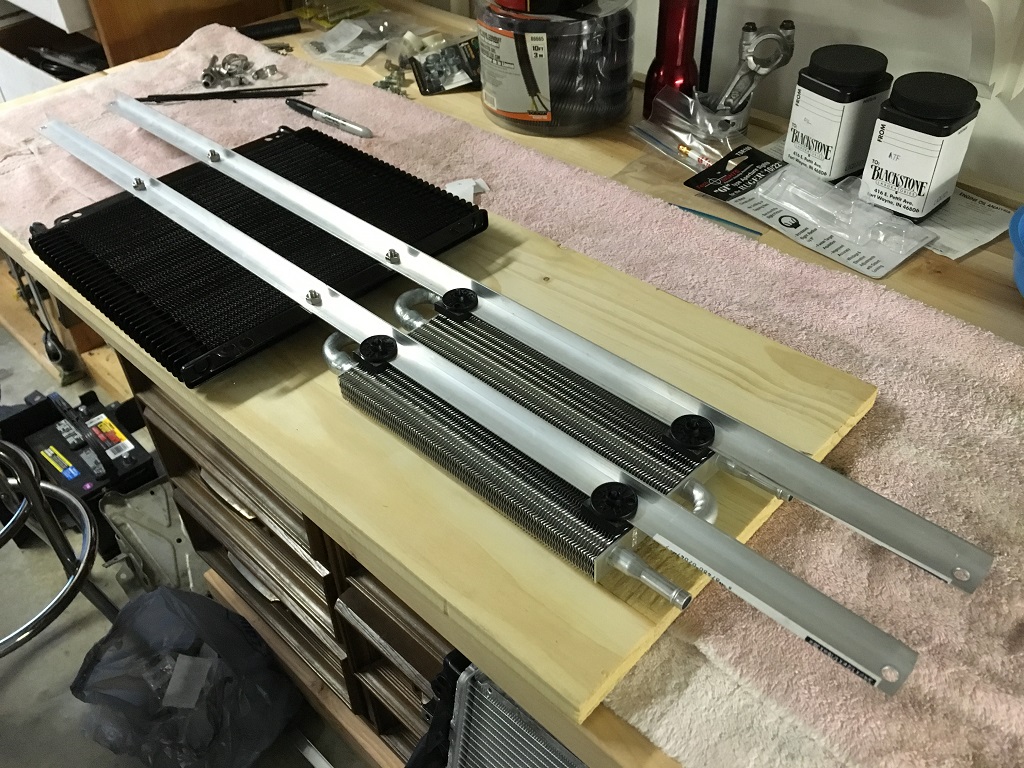
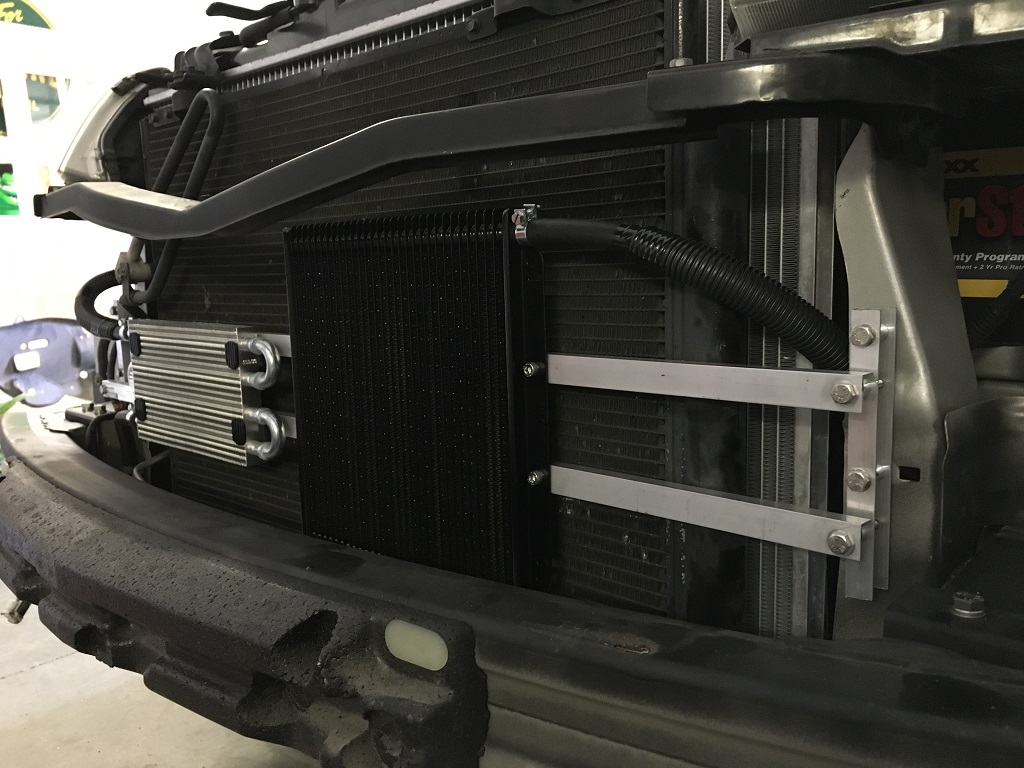
I mounted the black one with stainless hex head cap screws and nuts. I mounted the shiny one through the fins, as it didn't have any mounting flanges. But rather than go through the condenser or radiator, I drilled small holes through my aluminum L-channel stock and zipped it straight to that.
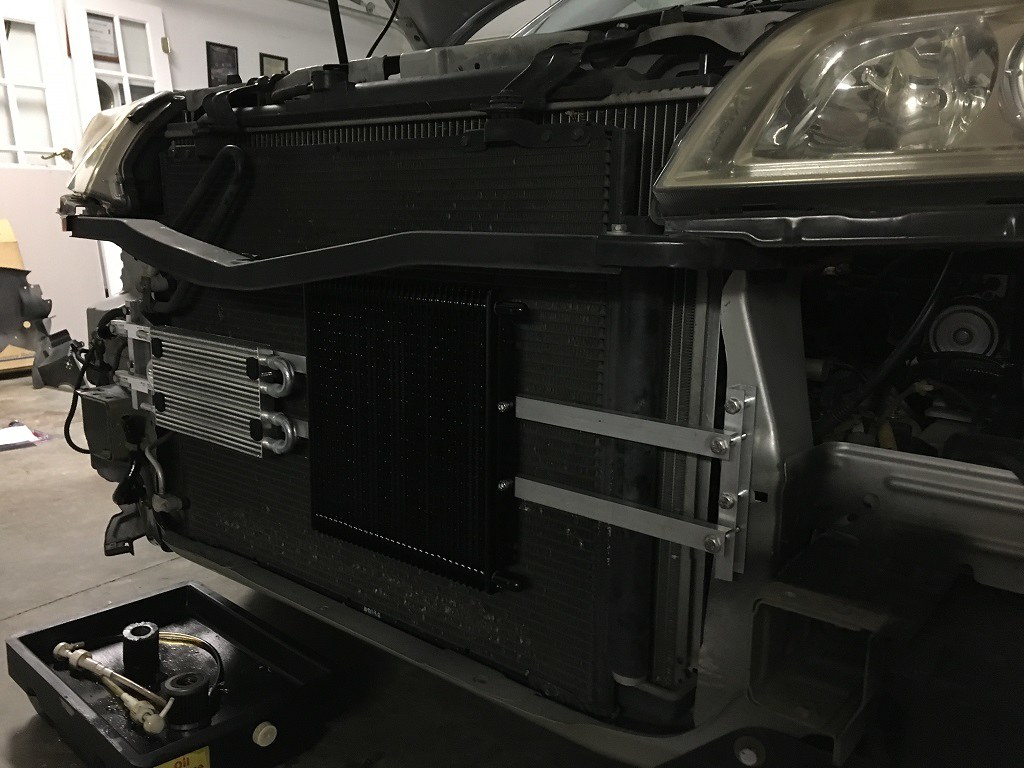
Installed on the vehicle.
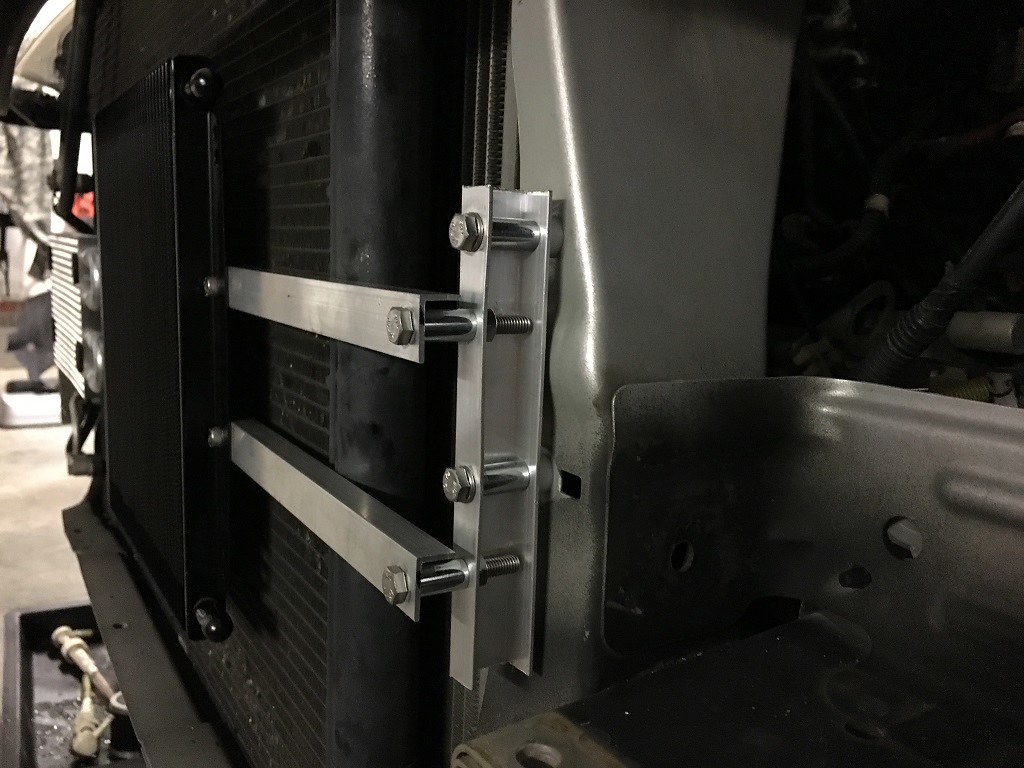
A close-up of the C-channel brackets on the side, and the L-channel stock mounted to them. I used .75" galvanized steel tube spacers to prevent any crushing, and used small .25" nylon spacers against the vehicle body.
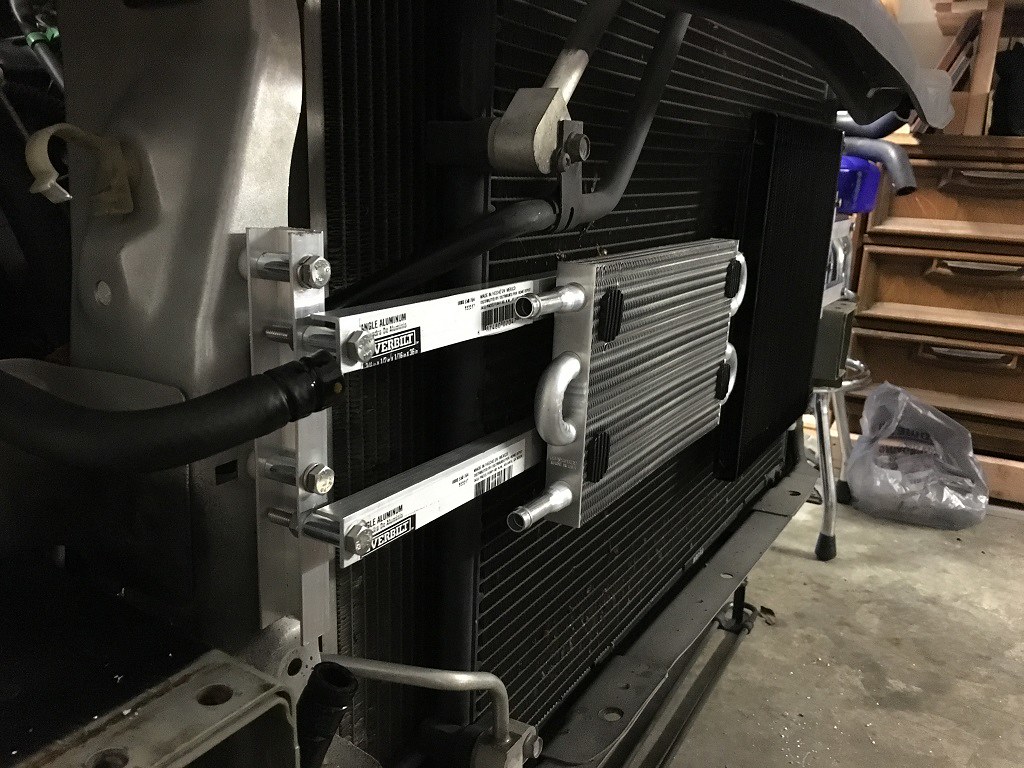
Mmmm...shiny...
Nice and tight spacing in front of the A/C condenser.
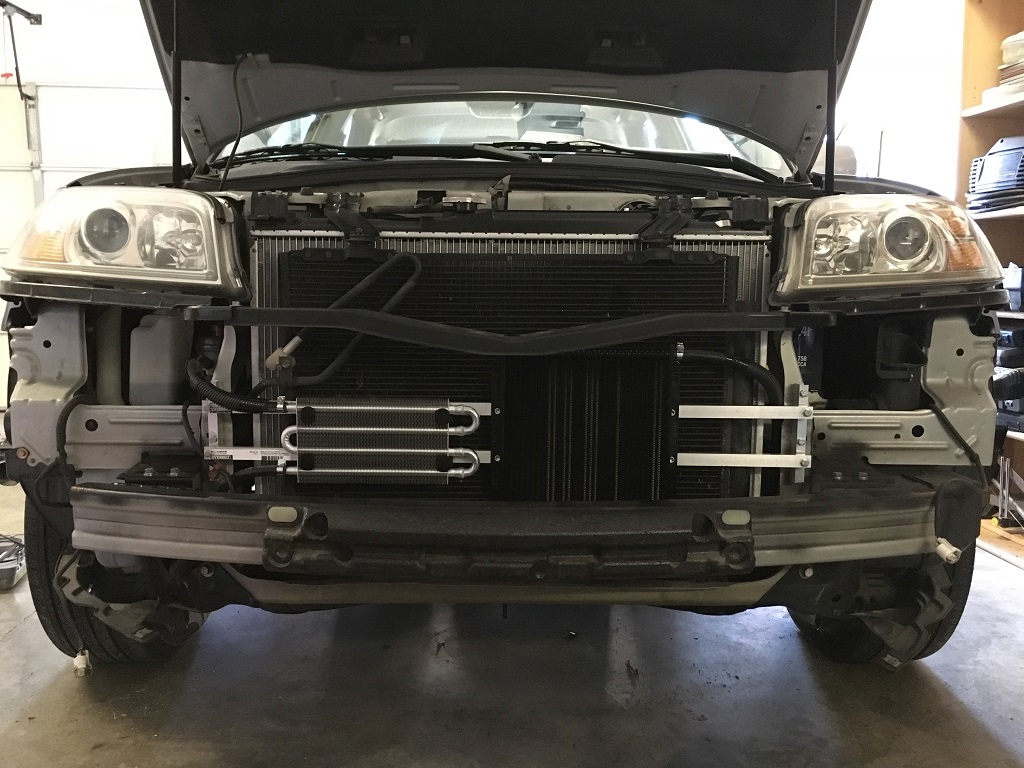
And here we are, all geared up. The new Chinese radiator is installed, with new Mexican Dayco radiator hoses, and all coolers are plumbed with American 3/8" Dayco hose...a real international effort, this.
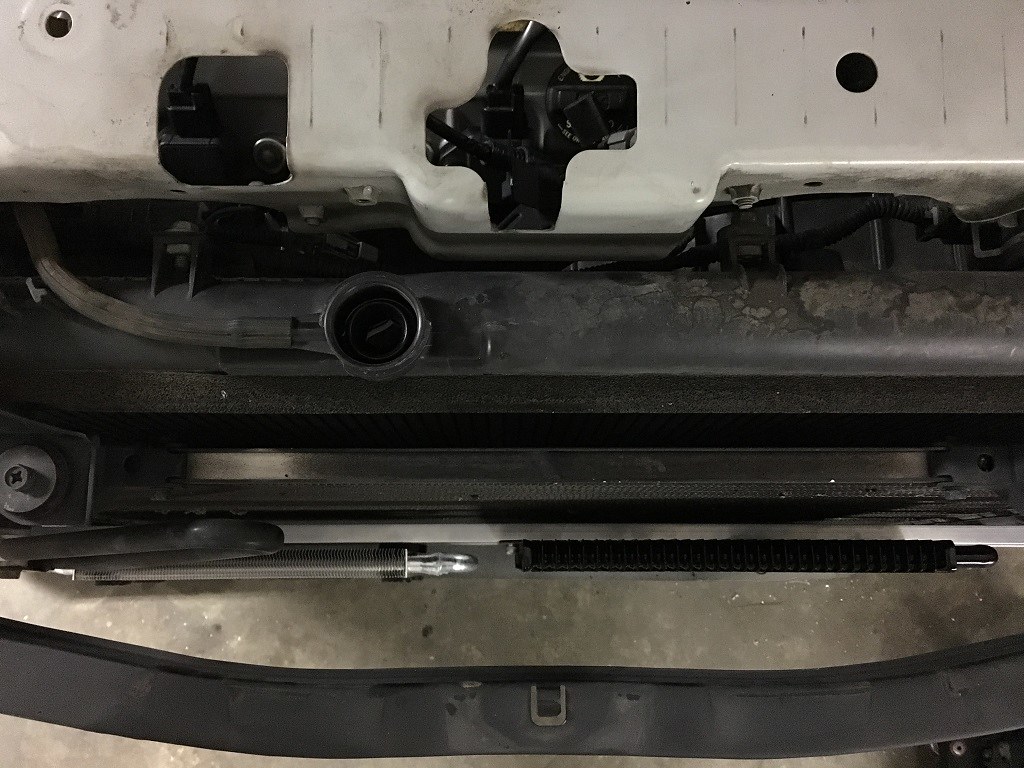
I went through a lot of 3/4" plastic wire loom that I just happened to have on hand. That was a good size to protect the 3/8" rubber hoses where they might chafe on something.
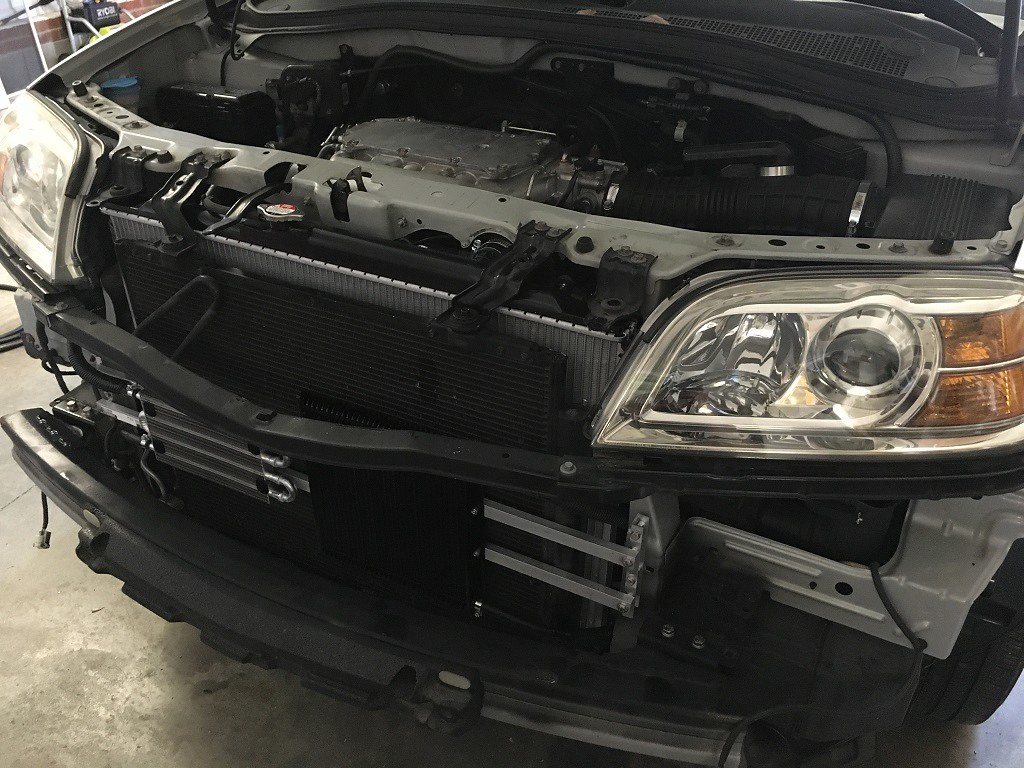
Everything fit nice. Disregard the black overspray in the bumper area -- that's a relic from an earlier install (when my folks had a front hitch bumper installed so they could tow this vehicle behind their motorhome).
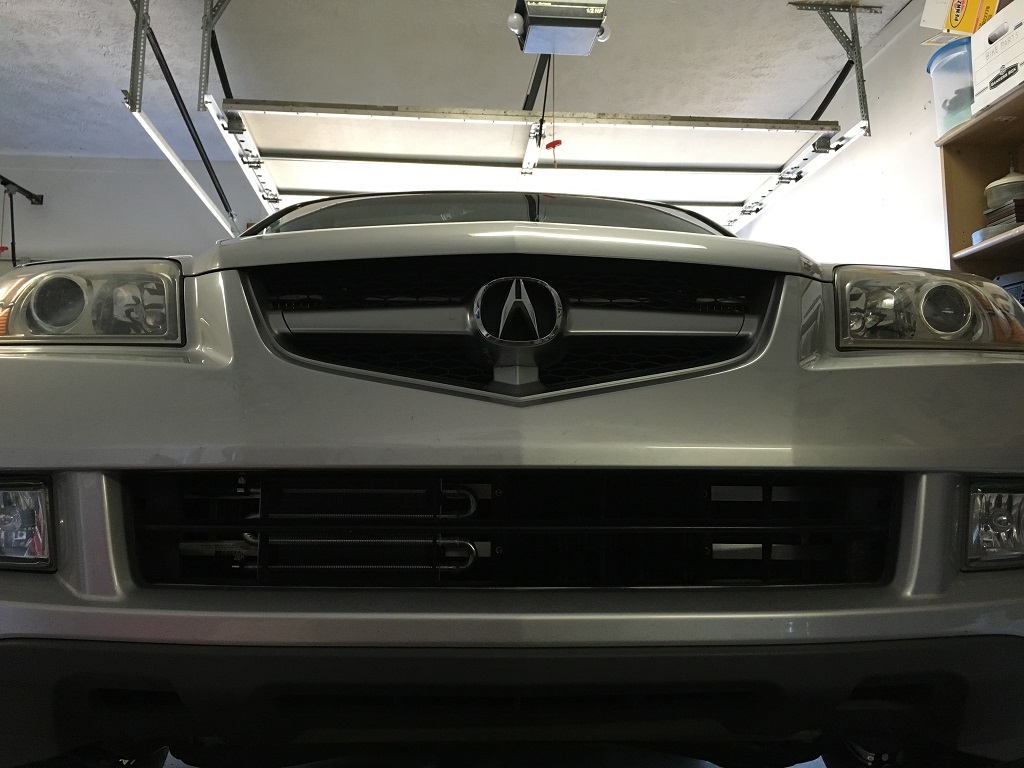
The coolers centered up perfect in the lower grille opening.
My total cost for the entire job was about $325. $100 for the radiator, $100 for the two coolers, and another $125 for all of the new hoses, aluminum stock, and hardware. I used stainless steel fasteners throughout, and that adds up fast!
I spent a lot of time on this project this weekend, just test fitting stuff, going back to the store for something else, etc. Fabricating a solution like this is something that I enjoy immensely, and I had a great time in the garage this weekend. Looking forward to some turkey in another few days, now!
That long U-shaped tube that spans the width of the opening is the power steering cooler. Gee, Honda, don't go out of your way for anything fancy, here.
Old power steering fluid cooler and bumper off...ready to start building.
These two holes right here (well, four, including the matching ones on the opposite post) would make great mounting points for some aluminum C-channel. More on that in a minute.
I gleaned some insight from our Ridgeline for this project, as it comes from the factory with power steering fluid and transmission fluid coolers in front of the condenser. The power steering fluid cooler is a simple two-pass serial flow cooler (like the MDX's U-shaped tube, but shorter, and with fins). So I figured that the smallest serial flow cooler I could get would suffice here for the MDX. The Ridgeline's transmission fluid cooler is a parallel flow multiplate cooler, much like a radiator in concept. So I bought a nice parallel flow multiplate cooler for this application to match it. Both were from Hayden and the shiny serial flow one was made in the United States and the black parallel flow one was made in Australia. Both appear to be very good quality. The pair cost about 100 bucks from Advance Auto.
I mounted the black one with stainless hex head cap screws and nuts. I mounted the shiny one through the fins, as it didn't have any mounting flanges. But rather than go through the condenser or radiator, I drilled small holes through my aluminum L-channel stock and zipped it straight to that.
Installed on the vehicle.
A close-up of the C-channel brackets on the side, and the L-channel stock mounted to them. I used .75" galvanized steel tube spacers to prevent any crushing, and used small .25" nylon spacers against the vehicle body.
Mmmm...shiny...
Nice and tight spacing in front of the A/C condenser.
And here we are, all geared up. The new Chinese radiator is installed, with new Mexican Dayco radiator hoses, and all coolers are plumbed with American 3/8" Dayco hose...a real international effort, this.
I went through a lot of 3/4" plastic wire loom that I just happened to have on hand. That was a good size to protect the 3/8" rubber hoses where they might chafe on something.
Everything fit nice. Disregard the black overspray in the bumper area -- that's a relic from an earlier install (when my folks had a front hitch bumper installed so they could tow this vehicle behind their motorhome).
The coolers centered up perfect in the lower grille opening.
My total cost for the entire job was about $325. $100 for the radiator, $100 for the two coolers, and another $125 for all of the new hoses, aluminum stock, and hardware. I used stainless steel fasteners throughout, and that adds up fast!
I spent a lot of time on this project this weekend, just test fitting stuff, going back to the store for something else, etc. Fabricating a solution like this is something that I enjoy immensely, and I had a great time in the garage this weekend. Looking forward to some turkey in another few days, now!
