Oil drain plug design causes a mess.

Status
Not open for further replies.
Joined
Dec 13, 2002
Messages
2,528
Location
North Carolina
The oil plug on my CTD "Cruze Turbo Diesel" is one I have never seen before.

I can say it makes one heck of a mess, since as soon as you back it out two threads it starts to flow oil everywhere. We all know, diesel oil sucks being so black and it gets hot.

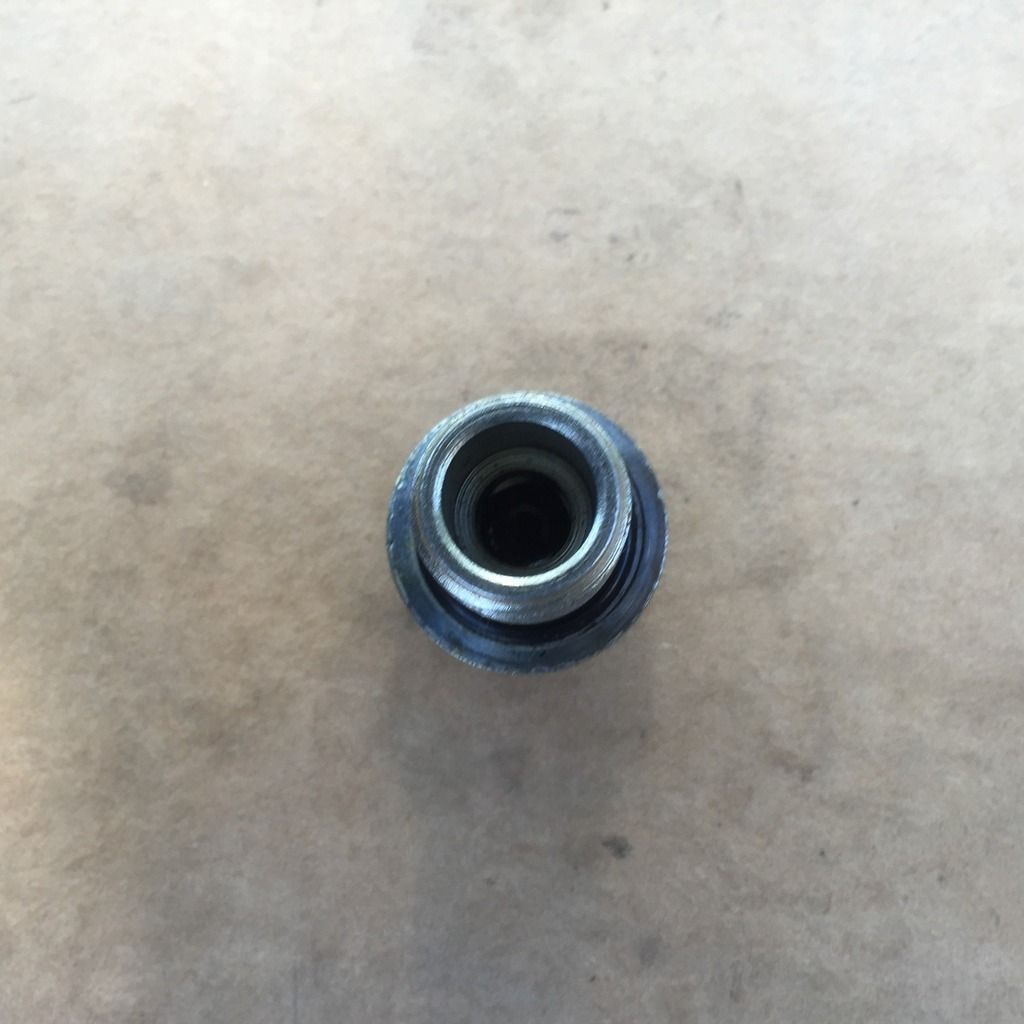
Anyhow, here is a picture of my drain plug. Just don't understand why GM designed it this way. Must be a reason. If I can put a Fumoto valve in, that is what I plan on doing. Just got to make sure it will work and not mess anything up. Can't see why it would.

On to the pictures.


From the vantage point of my armchair, it looks like the oil is supposed to flow down through it? Maybe it was designed by an engineer who pays someone else to change his oil...
 
Originally Posted By: Ethan1
Maybe it was designed by an engineer who pays someone else to change his oil...

Or for the dealer tech who is going to loosen to drain, then move on to the vehicle in the next bay and come back a half-hour later, so he won't care how slowly the oil drains.
 
I did vent the system by opening the fill cap. The mess is the oil flows back toward the oil pan as it hits the front of the plug coming out. so it was dripping from four different areas of the aluminum oil pan.

I found the Fumoto Valve that fits it. Going to order it and install on next oil change. I have the FV on my truck and Acadia and love it.
 
Originally Posted By: Tegger
Originally Posted By: Ethan1
Maybe it was designed by an engineer who pays someone else to change his oil...

Or for the dealer tech who is going to loosen to drain, then move on to the vehicle in the next bay and come back a half-hour later, so he won't care how slowly the oil drains.


That makes sense and they can put the catch pan right up next to the oil pan so it would not splash as bad. But for us DIMS'ers it makes a mess.
 
Actually I like this design, it appears they are trying to keep the oil from splattering outside the oil drain pan when it is being serviced.
 
same plug on mine. you don't remove it completely unless you want to change it or the seal. no mess here, I always put the recepticle under the sump before undoing the plug.
 
Originally Posted By: Rat407

Just don't understand why GM designed it this way. Must be a reason.


That was the worst pos oilplug i ever seen
laugh.gif


I cant imagine GM actually designed it that way, I more believe that GM was offered a huge amount of cheap hollow plugs from a production overrun in China. The plugs was probably intended for lawnmowers or something else from the beginning.

But seriously change it to a oilplug that is not hollow, I know that there is solid oilplugs to the Cruze also.
 
Originally Posted By: Tegger
Originally Posted By: Ethan1
Maybe it was designed by an engineer who pays someone else to change his oil...

Or for the dealer tech who is going to loosen to drain, then move on to the vehicle in the next bay and come back a half-hour later, so he won't care how slowly the oil drains.


..and while your waiting in the lobby, they can sell you up on some fine new tires!!!
 
the oil drains quick enough. you also have a filter to change, tyres to inflate, threads to check, inspect shocks, look at brake pads and discs etc...
 
Right from the GM Service Manual:

(and it is a [censored] design for sure - see text in RED)


xTooltipElement
Service Information


2015 Chevrolet Cruze | Cruze Service Manual US/Canada 7692882 | Engine/Propulsion | Engine Mechanical - 2.0L LUZ Diesel | Repair Instructions - On Vehicle | Document ID: 3247763
--------------------------------------------------------------------------------

Engine Oil and Oil Filter Replacement
Removal Procedure 1. Raise and support the vehicle. Refer to Lifting and Jacking the Vehicle.


 2. Place a drain pan under the oil drain screw.
Note: DO NOT remove the engine oil pan drain plug when changing the engine oil. Removing the engine oil pan drain plug completely will result in the engine oil pan drain plug gasket becoming dislodged or lost.

 3. Loosen the oil drain screw (1).
 4. Allow the oil to drain completely.
Caution: Refer to Fastener Caution.

 5. Tighten the oil pan drain screw to 20 Y (15 lb ft).


Note:

◦Do NOT use an open end wrench on the hex on top of the oil filter cap.
◦Use care when removing the engine oil filter cap and filter to minimize fluid spillage. If fluid spillage occurs it must be cleaned with appropriate cleaner.
◦Inspect the oil filter cap for any cracks or damage. If the oil filter cap is damaged it must be replaced.
 6. Remove the oil filter cap (1) along with the oil filter element (2) and the oil filter cap seal ring.
 7. Unclip the oil filter element from the oil filter cap.
 8. DISCARD the oil filter cap seal ring.
Installation Procedure


 1. Install a NEW oil filter cap seal ring (1) to the shown groove (arrow).
 2. Lubricate the oil filter cap threads (2) and the oil filter cap seal ring with clean engine oil.


 3. Clip the NEW oil filter element (2) to the oil filter cap (1).


Caution: Ensure oil filter cap is completely seated on oil filter housing. If not completely seated an oil leak may occur.

Caution: Over torquing the oil filter cap may cause damage to the oil filter cap resulting in an oil leak.

Note: DO NOT use an open end wrench on the hex on top of the oil filter cap.

 4. Install the oil filter cap along with the oil filter element and the NEW oil filter cap seal ring and tighten to 25 Y (18 lb ft).
 5. Clean excess oil from the oil filter drain deflector.
 6. Lower the vehicle.
Caution: Using engine oils of any viscosity other than those viscosities recommended could result in engine damage.

Note:

◦DO NOT overfill the diesel engine when performing an engine oil/filter change. If the diesel engine is overfilled, the engine can continue to run when turned OFF by using the additional oil as fuel, resulting in internal engine and exhaust system damage.
◦Anytime engine oil is added (top off or oil changes) ensure all engine surfaces are completely free of residual oil. If there is oil to any engine surface clean as necessary.
 7. Fill the engine with oil. Refer to Engine Mechanical Specifications.


Note: Oil fill cap must be properly seated and tightened during installation.

 8. Install oil fill cap.
 9. Start the engine and allow it to run until the oil pressure control indicator goes off. Inspect for any oil leaks around the drain plug, oil filter and oil fill cap.


10. Inspect the engine oil level. The oil level should be in the cross-hatched section (1) of the oil level indicator as shown.
11. Reset the GM oil life system. Refer to GM Oil Life System Resetting.
© 2015 General Motors. All rights reserved.
 
Sorry about the cut and paste above ^^^^ for some reason only BITOG adds junk characters..but you can get the idea
 
Status
Not open for further replies.
Back
Top