It has been about 10 months since I last gave my personal car any kind of exterior detailing.
As some of you may have seen, the Opti-Coat 2.0 was still performing very well -- so a detail was not completely necessary at this time.
However, I felt that I have greatly increased my paint correction skills since my car was last worked on, and as a result - I think I could get my car's finish to a much higher level.
In addition, when the car was last coated, I only did a light polish using a very light finishing polish, so there were still defects leftover from my tunnel carwash days.
So here we go...
Tools used:
Rupes LHR21ES - correction step
Rupes LHR12E - finishing step
Rupes LHR75E - used for the correction and finishing steps on the liftgate
Rupes Swirl Finder Pen Light
Products used:
Wash: Meguiars D110 Hyper Wash
Decontamination: Meguiars C2000 Fine Grade Detailing Clay
Clay Lube: Optimum No Rinse - Diluted 1:16
Correction Step: Meguiars M100 with Meguiars DMF6 Microfiber Finishing Discs (to remove Opti-Coat 2.0 and remove most defects)
Refinement Step: Meguiars M205 with Rupes Yellow Foam Polishing Pads
Pre-Coating Wipe-down: CarPro Eraser
Paint Protection: CarPro CQuartz UK, 2014 Edition. The roof received two coats, while the rest of the car received one coat. I used about 15ml for the entire car. Also, you will need 3-4 suede applicators (must be swapped out every few panels once they begin to harden) and 3 suede towels for the application process; any deviation from this approach may result in streaking and high spots which will require re-polishing the vehicle.
Note: As required by CarPro, I also did a final wipe-down with CarPro Reload; the Reload is supposed to prevent water spots from forming during the first 24 hours of the coating's curing process.
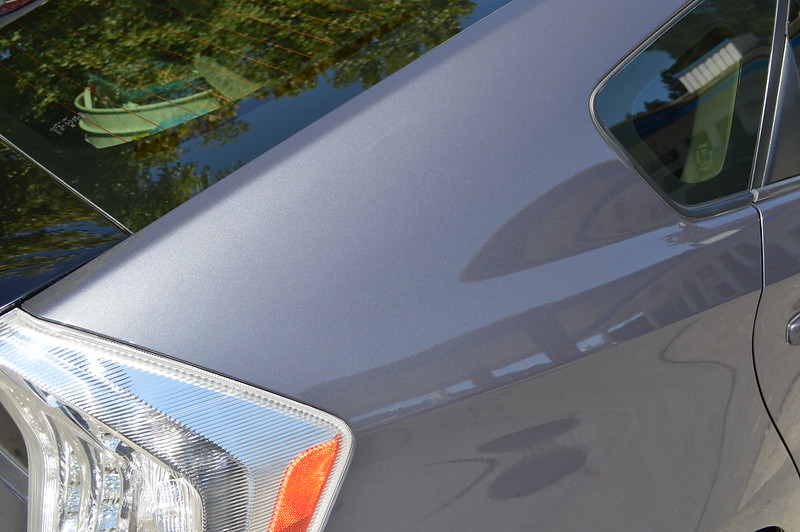
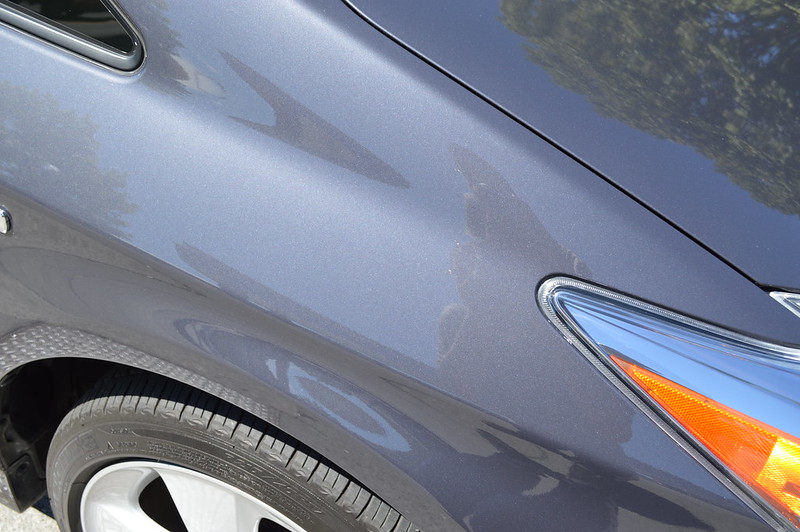
Here's a picture of the paint after the compounding step.
 DSC_1119 by thecritic89, on Flickr
I used light pressure, speed 3 and a total of 3 passes in about 16"x16" sections; I think the total work time was about 2 minutes per section. There's a minimal amount of DA haze and some light to moderate micro-marring from the Meguiars microfiber finishing disc. I was getting 90% + correction with this combo and approach.
(For what it's worth, I later used M100 with the new-style Meguiars MF Finishing Discs and found that there's almost zero micro marring using the same approach, hmm...)
I did not take any additional pictures during the correction process, but I should mention that I tested multiple combos for the finishing step. I tried both HD Adapt and M205, paired with either Buff & Shine Blue Finishing Pads and Rupes Yellow Foam Pads.
For some reason, HD Adapt was not behaving well in the warm and humid work environment, so unfortunately it was out...which is a shame since it did finish out a touch better than M205. Unfortunately, due to time constraints, a 3rd finishing step was not possible for this car...but I was still fairly happy with the finish that I was able to get from M205.
Also, the Buff & Shine Blue finishing pads were only removing about 90% of the micro-marring; the Rupes Yellow Pads removed all of the micro-marring and left the same finish. I am starting to agree that stiffer foam pads work best on these larger-stroke DA machines.
Some people have reported problems finishing with full-strength M205, and I think the issue is sometimes related to the amount of product that they are using. M205 has a lot of abrasives in it, and can be used for heavy correction if it is paired with the right pad and machine.
For finishing, IMO, you need to use a small amount (1-2 small drops) and limit your working time to 30-45 seconds...which is about 2-3 moderate-speed passes. Just realize that this approach WILL result in some amount of filling (due to the oils not fully breaking down), so it is VERY important to IPA wipe your test section multiple times to ensure that you are getting the result that you wanted.
Another approach is to mix 12 drops of M205 in a quart of water (Kevin Brown came up with this idea), and use this to finish down. However, this approach was not aggressive enough to remove all of the leftover micro-marring in one "session," but I can see it working well for light haze on finicky paints.
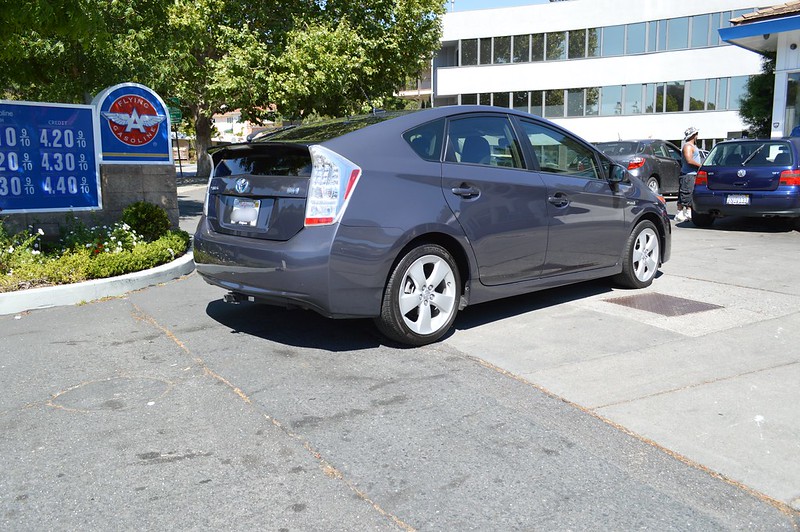
Anyway, here are some final pictures. My photography skills really do not capture the gloss and darkening effect that CQuartz UK added to the finish:
 DSC_1141 by thecritic89, on Flickr
 DSC_1139 by thecritic89, on Flickr
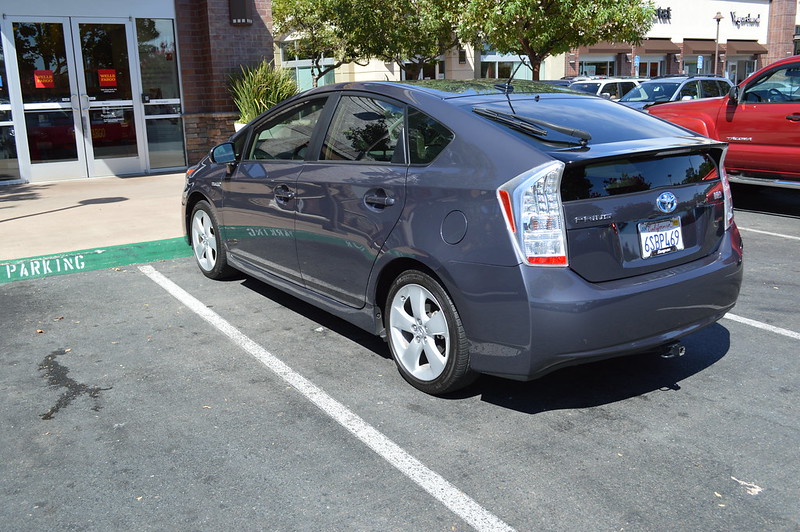 DSC_1147 by thecritic89, on Flickr
 DSC_1142 by thecritic89, on Flickr
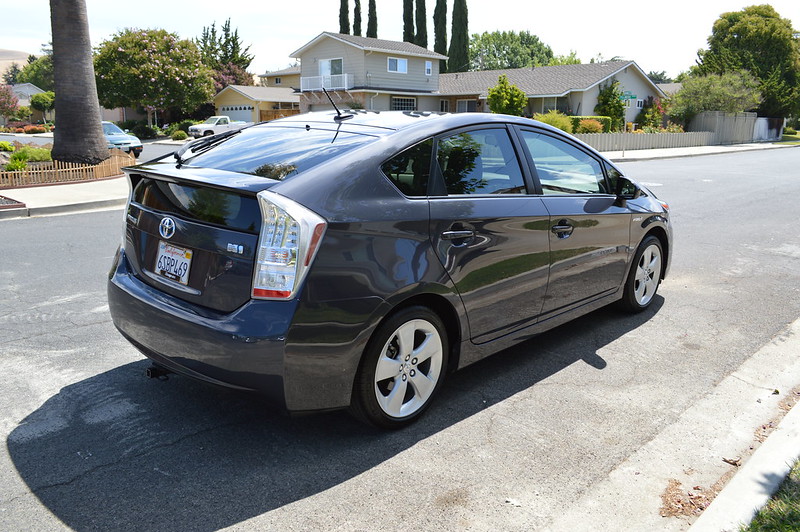 DSC_1127 by thecritic89, on Flickr
 DSC_1131 by thecritic89, on Flickr
Here are a few tips on the CQuartz UK application process. For one, I found it to be a lot more challenging than Opti-Coat. It is fairly finicky and does not like warm, humid temperatures.
The trick is to go heavy on the product ($$), do long/fast strokes and apply it to very small sections at a time. Apply, and wipe-up IMMEDIATELY. For instance, I would split up my doors into 5 sections. You will also need to swap out the applicators every few panels because the product will begin to harden on the suede applicators (and you may experience streaking issues); a good rule of thumb is to swap out the suede applicator piece whenever you start to feel more resistance during the spreading of the product.
Lastly, only use the CarPro Suede Towels to wipe up the reside. They have a tremendous amount of "bite" which allow them to easily wipe-up the residue, yet they will not marr the surface. However, they have very little capacity so they will need to be swapped out every couple of panels...or else you'll find yourself re-depositing the residue back onto the surface.
I hope you enjoyed this long read. If you have any questions, please let me know!
- Critic
As some of you may have seen, the Opti-Coat 2.0 was still performing very well -- so a detail was not completely necessary at this time.
However, I felt that I have greatly increased my paint correction skills since my car was last worked on, and as a result - I think I could get my car's finish to a much higher level.
In addition, when the car was last coated, I only did a light polish using a very light finishing polish, so there were still defects leftover from my tunnel carwash days.
So here we go...
Tools used:
Rupes LHR21ES - correction step
Rupes LHR12E - finishing step
Rupes LHR75E - used for the correction and finishing steps on the liftgate
Rupes Swirl Finder Pen Light
Products used:
Wash: Meguiars D110 Hyper Wash
Decontamination: Meguiars C2000 Fine Grade Detailing Clay
Clay Lube: Optimum No Rinse - Diluted 1:16
Correction Step: Meguiars M100 with Meguiars DMF6 Microfiber Finishing Discs (to remove Opti-Coat 2.0 and remove most defects)
Refinement Step: Meguiars M205 with Rupes Yellow Foam Polishing Pads
Pre-Coating Wipe-down: CarPro Eraser
Paint Protection: CarPro CQuartz UK, 2014 Edition. The roof received two coats, while the rest of the car received one coat. I used about 15ml for the entire car. Also, you will need 3-4 suede applicators (must be swapped out every few panels once they begin to harden) and 3 suede towels for the application process; any deviation from this approach may result in streaking and high spots which will require re-polishing the vehicle.
Note: As required by CarPro, I also did a final wipe-down with CarPro Reload; the Reload is supposed to prevent water spots from forming during the first 24 hours of the coating's curing process.
Here's a picture of the paint after the compounding step.
DSC_1119 by thecritic89, on FlickrI used light pressure, speed 3 and a total of 3 passes in about 16"x16" sections; I think the total work time was about 2 minutes per section. There's a minimal amount of DA haze and some light to moderate micro-marring from the Meguiars microfiber finishing disc. I was getting 90% + correction with this combo and approach.
(For what it's worth, I later used M100 with the new-style Meguiars MF Finishing Discs and found that there's almost zero micro marring using the same approach, hmm...)
I did not take any additional pictures during the correction process, but I should mention that I tested multiple combos for the finishing step. I tried both HD Adapt and M205, paired with either Buff & Shine Blue Finishing Pads and Rupes Yellow Foam Pads.
For some reason, HD Adapt was not behaving well in the warm and humid work environment, so unfortunately it was out...which is a shame since it did finish out a touch better than M205. Unfortunately, due to time constraints, a 3rd finishing step was not possible for this car...but I was still fairly happy with the finish that I was able to get from M205.
Also, the Buff & Shine Blue finishing pads were only removing about 90% of the micro-marring; the Rupes Yellow Pads removed all of the micro-marring and left the same finish. I am starting to agree that stiffer foam pads work best on these larger-stroke DA machines.
Some people have reported problems finishing with full-strength M205, and I think the issue is sometimes related to the amount of product that they are using. M205 has a lot of abrasives in it, and can be used for heavy correction if it is paired with the right pad and machine.
For finishing, IMO, you need to use a small amount (1-2 small drops) and limit your working time to 30-45 seconds...which is about 2-3 moderate-speed passes. Just realize that this approach WILL result in some amount of filling (due to the oils not fully breaking down), so it is VERY important to IPA wipe your test section multiple times to ensure that you are getting the result that you wanted.
Another approach is to mix 12 drops of M205 in a quart of water (Kevin Brown came up with this idea), and use this to finish down. However, this approach was not aggressive enough to remove all of the leftover micro-marring in one "session," but I can see it working well for light haze on finicky paints.
Anyway, here are some final pictures. My photography skills really do not capture the gloss and darkening effect that CQuartz UK added to the finish:
DSC_1141 by thecritic89, on FlickrDSC_1139 by thecritic89, on FlickrDSC_1147 by thecritic89, on FlickrDSC_1142 by thecritic89, on FlickrDSC_1127 by thecritic89, on FlickrDSC_1131 by thecritic89, on FlickrHere are a few tips on the CQuartz UK application process. For one, I found it to be a lot more challenging than Opti-Coat. It is fairly finicky and does not like warm, humid temperatures.
The trick is to go heavy on the product ($$), do long/fast strokes and apply it to very small sections at a time. Apply, and wipe-up IMMEDIATELY. For instance, I would split up my doors into 5 sections. You will also need to swap out the applicators every few panels because the product will begin to harden on the suede applicators (and you may experience streaking issues); a good rule of thumb is to swap out the suede applicator piece whenever you start to feel more resistance during the spreading of the product.
Lastly, only use the CarPro Suede Towels to wipe up the reside. They have a tremendous amount of "bite" which allow them to easily wipe-up the residue, yet they will not marr the surface. However, they have very little capacity so they will need to be swapped out every couple of panels...or else you'll find yourself re-depositing the residue back onto the surface.
I hope you enjoyed this long read. If you have any questions, please let me know!
- Critic


