Shift Knob restoration

Status
Not open for further replies.
Joined
May 27, 2002
Messages
3,354
Location
Bolivia
When I restored my Corvair I couldn't find an original shift knob, so I had to use a generic knob without the 3 speed pattern. More details and pics on my site.

I just found an original knob, with 50 years of weathering, and thought I'd share the results.

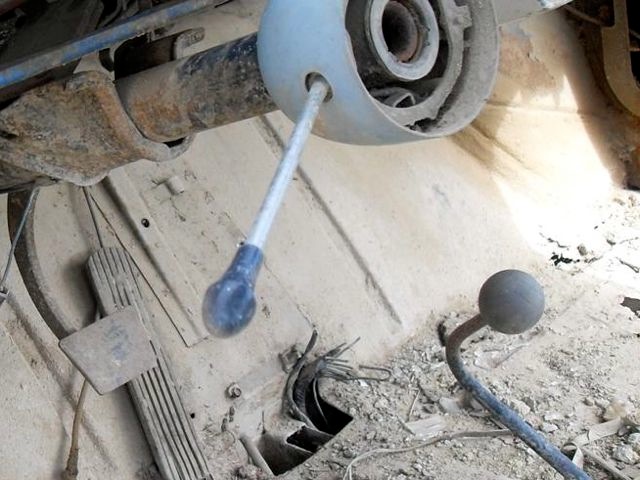
This picture is as I found it.
page42-1000-full.jpg


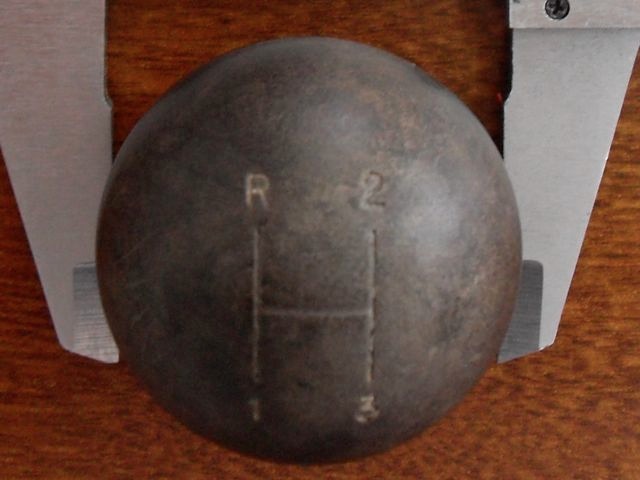
Here is the closeup of the pattern after cleaning it up
page42-1001-full.jpg


Another look at it

page42-1002-full.jpg


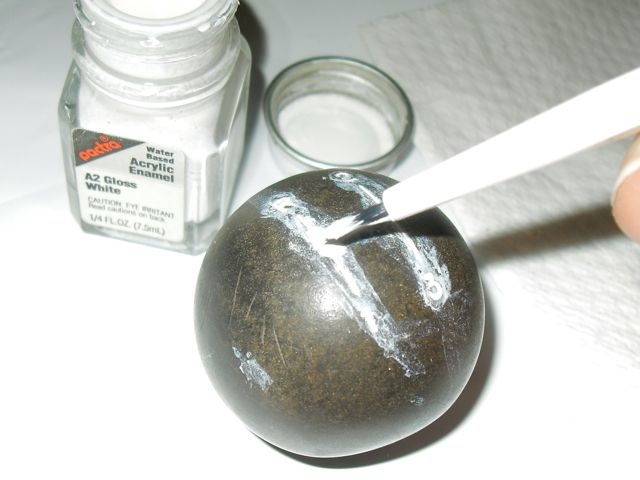
After cleaning out the grooves, filling them with paint
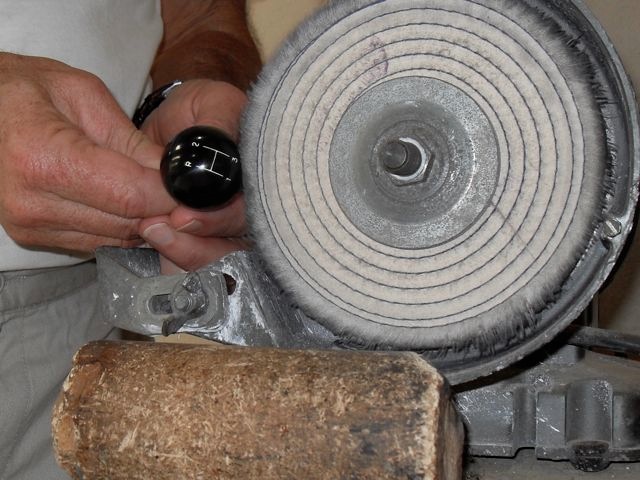
page42-1004-full.jpg


A little sanding
page42-1006-full.jpg


And a final (actually semi-final, as my buffer is in Tarija. I'll finish buffing when I get there to put it on the car)

page42-1008-full.jpg
 
Nice!
Thanks for posting, I'm always looking for tips like this for the old VW Bus (that will be really nice...someday)
 
I have used the same method when working on a degree wheel with degree marks every 5* they can become very hard to read, and even more so with a strobe light at machine operating speed, however when filled with a black paint (in my case the wheel is aluminum) a scotchbrite pad, 600 grit paper, or even a cleaning rag will pop each mark out very vivid... I have also used this method when restoring old IH Cub Cadets, the serial plate seems to always get the paint removed ? Paint over as you did, and again as noted above you can catch it at the correct time rubbing over it with a straight blade to remove excess paint, or lightly sand to pop/restore to like new condition !!
 
Nice! I did something like this on an aperture ring on a SLR camera lens a while back... with white-out typewriter correction fluid!
 
Originally Posted By: Vikas
How did you clean it initially so that the paint would stick on it?
Knife and needle. Then wiped everything with goof off.
 
Acetone or 99% alcohol also works very well, you just want to degrease... but be careful of the material your working with as you don't want to melt it, If nothing else you can use sand paper to clean it, and the possibilities are endless with sand paper using wet high quality paper you can achieve a polished look.. local stores like auto parts etc will have paper up to 1200 grit which is pretty fine... You can also spray/dip the part if it's plastic in a clear acrylic, and I have used polycrylic clear with outstanding results. Also a clear epoxy which will hold up great to hard use such as a shifter knob etc... both will "pop" the color back as well give it the deep black in this case, and protect it, but remember prep work is the key here..
 
Last edited:
Your attention to detail on this car is simply amazing.....it borders on crazy and I mean that in a nice way.
 
I've heard comments like that.

as rclint said, the sanding is critical. and with recessed parts, just be careful not to sand too much.

This is all similar to what I did with the stainless and aluminum, just that those didn't have inlaid text.

Doing to wrenches sounds like a good idea
 
Status
Not open for further replies.
Back
Top